# Strapi Cloud
️❗️ WARNING
Strapi Cloud is currently in Closed Beta release. Features and functionality may change prior to General Availability.
This is a step-by-step guide for deploying your Strapi application on Strapi Cloud. Before you are able to access Strapi Cloud, you must first request access to the Beta release.
# Requesting access
To request access you must sign up for the waitlist here (opens new window). Be sure to enter your correct GitHub username and Discord ID as these are used to grant access to the Strapi Cloud Beta.
Onboarding of users will be done in batches. You will be notified via email when you have been granted access to Strapi Cloud.
# Prerequisites
Before you can deploy your Strapi application on Strapi Cloud, you need to have the following prerequisites:
- A GitHub (opens new window) account
- GitHub repository for your Strapi application(s)
- Strapi version 4.1+
💡 TIP
The connected repository can contain multiple Strapi applications. Each Strapi app must be in a separate directory.
# Getting started
Navigate to the Strapi Cloud (opens new window) login page.
You are prompted to Log In with GitHub. Your Strapi Cloud account is created during this initial login.
Once logged in, you will be redirected to the Strapi Cloud Projects page. From here you can create your first Strapi Cloud project.

# Create a project
From the Projects page, click the Create Project button. You are prompted to Connect with GitHub.
💡 TIP
Connect the GitHub account and/or Organizations that own the repository or repositories you want to deploy. This can be different from the account that owns the Strapi Cloud account.
You will be redirected to GitHub to authorize Strapi Cloud to access your repository.
After granting the required access from GitHub, from the Projects page select your desired repository to install Strapi Cloud.
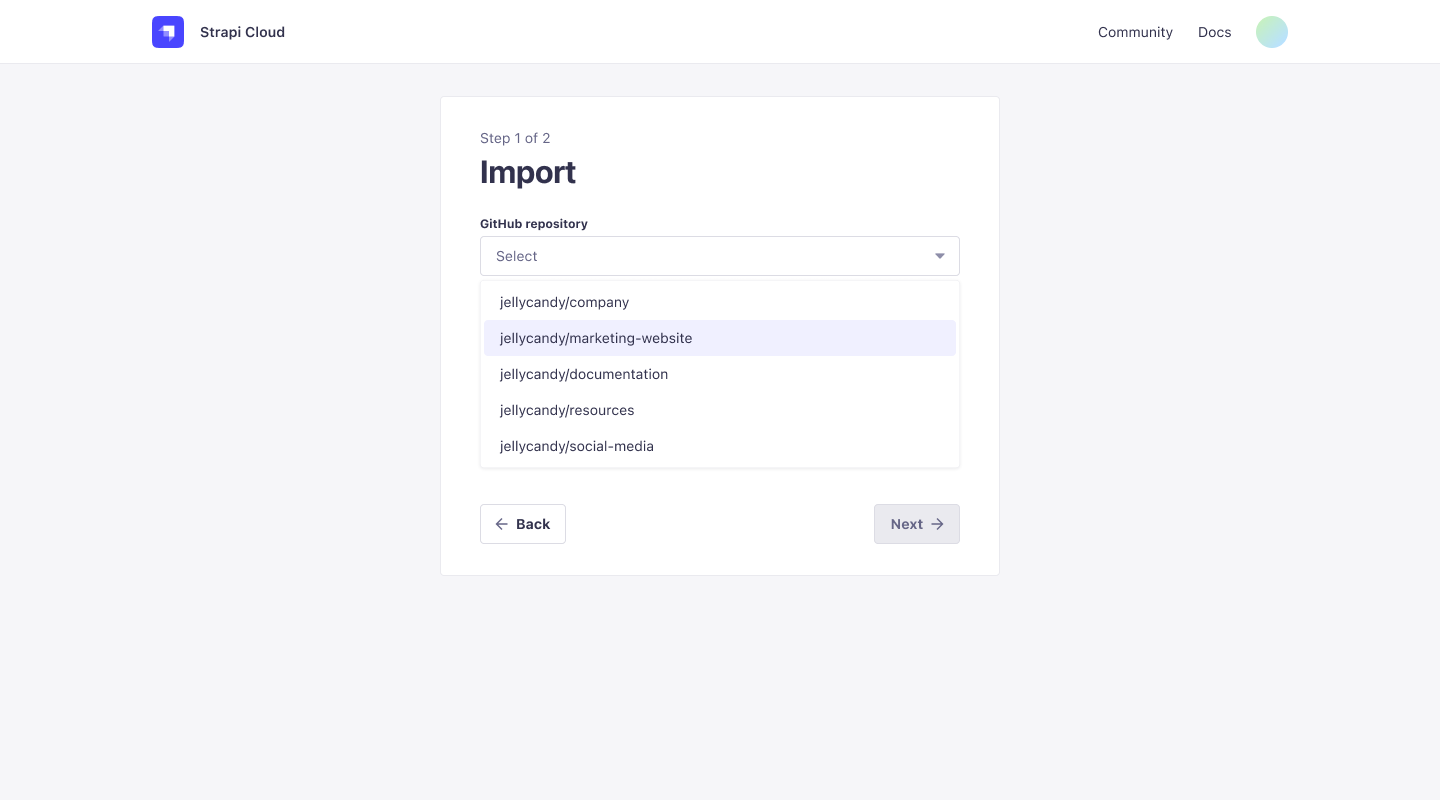
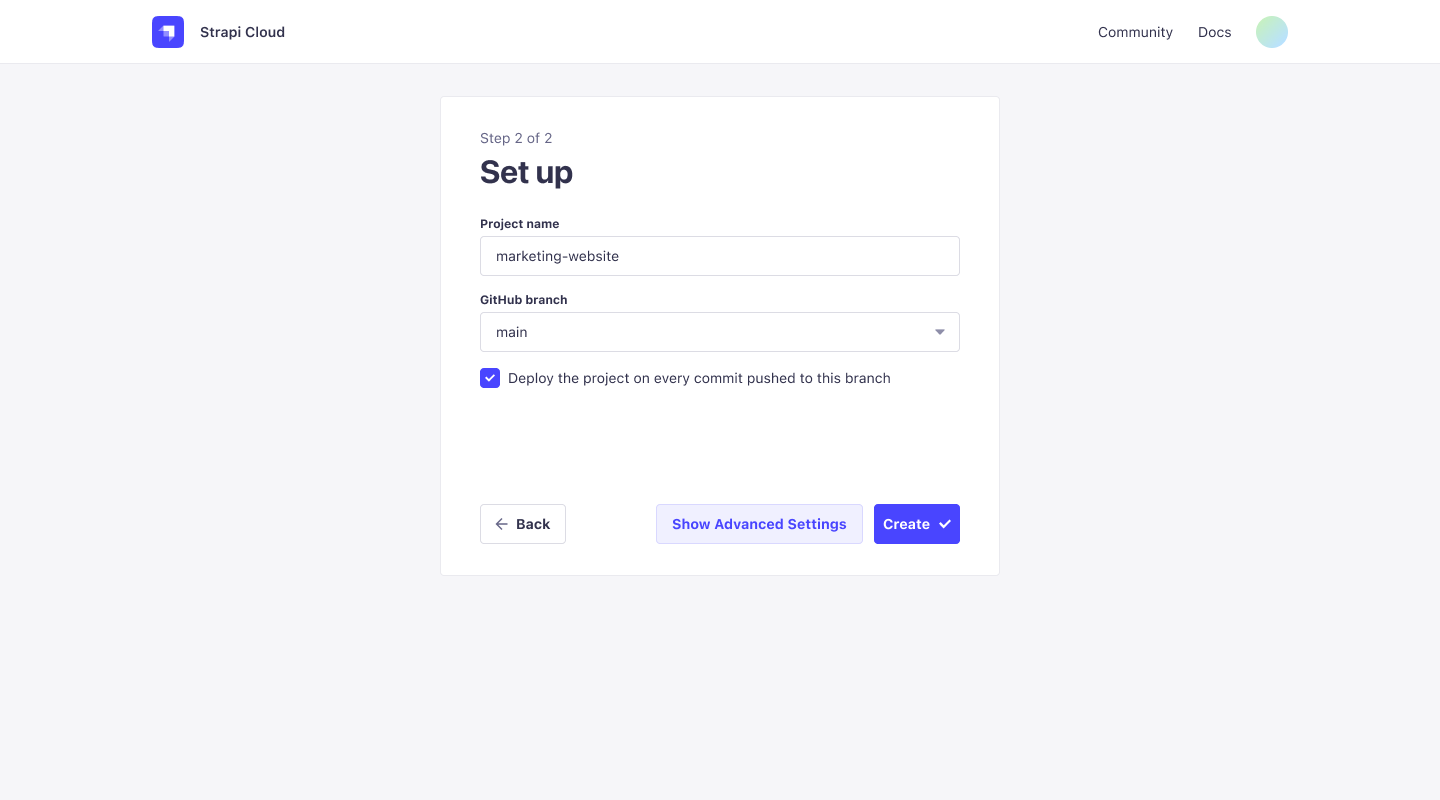
Click Next to proceed to the Project Set up page and enter the following information:
- Project name: The name of your Strapi app, this is fetched from the repository name but can be edited. It is automatically converted to slug format (
my-strapi-app). - GitHub branch: The default branch to use for this deployment. This uses the default branch (opens new window) of the repository but can be changed via the drop-down.
- Deploy on push: When enabled, this will automatically deploy the latest changes from the selected branch. When disabled, you will need to manually deploy the latest changes.
- Project name: The name of your Strapi app, this is fetched from the repository name but can be edited. It is automatically converted to slug format (
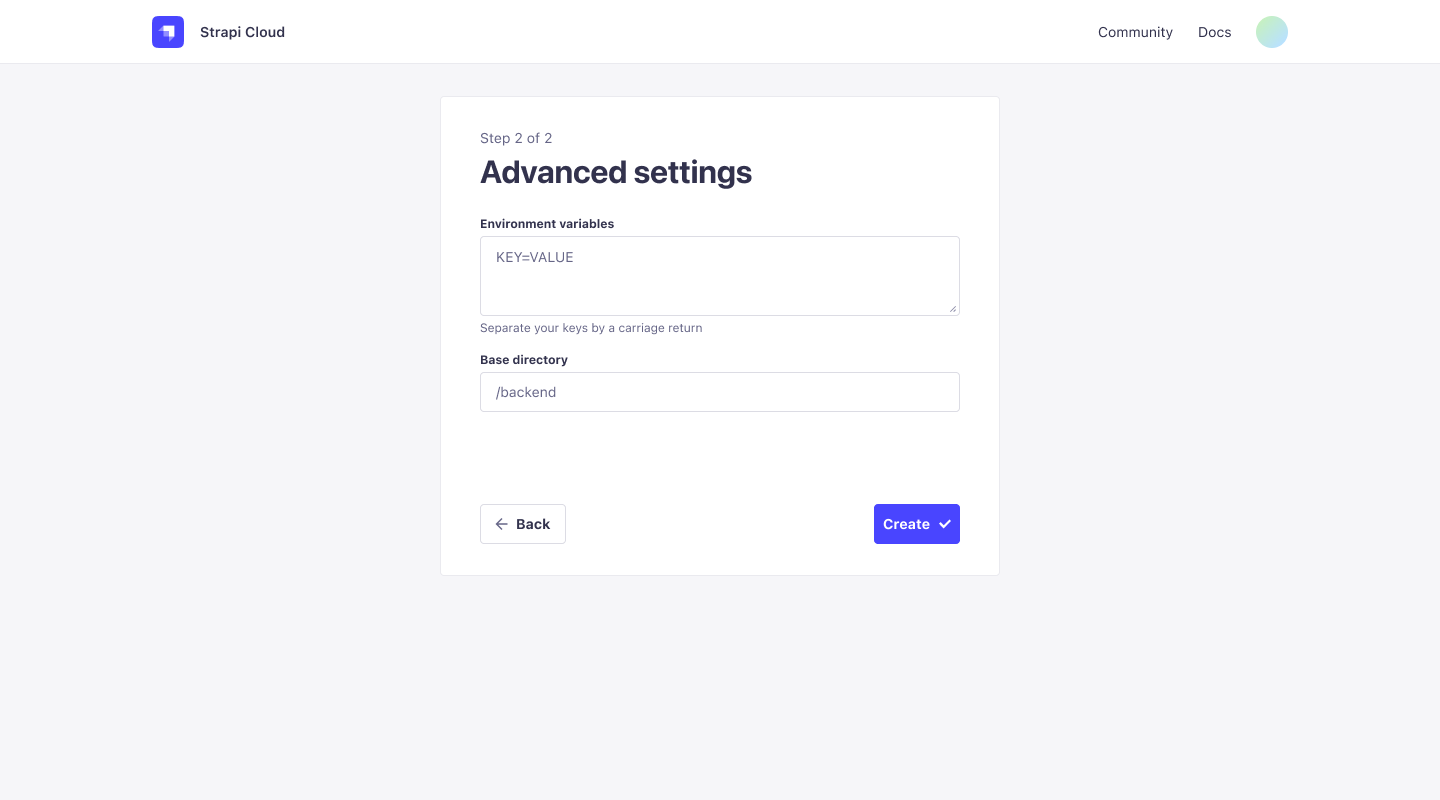
(Optional) Select Show Advanced Settings to configure the following options:
- Environment variables: Environment variables are used to configure your Strapi app.
- Base directory: The directory where your Strapi app is located in the repository. This is useful if you have multiple Strapi apps in the same repository or if you have a monorepo.
Click Create to finalize the project creation. An initial deployment is triggered and you are redirected to the Projects page.
# Managing projects
The Projects page displays a list of all your Strapi Cloud projects. From here you can manage your projects and access the corresponding applications.
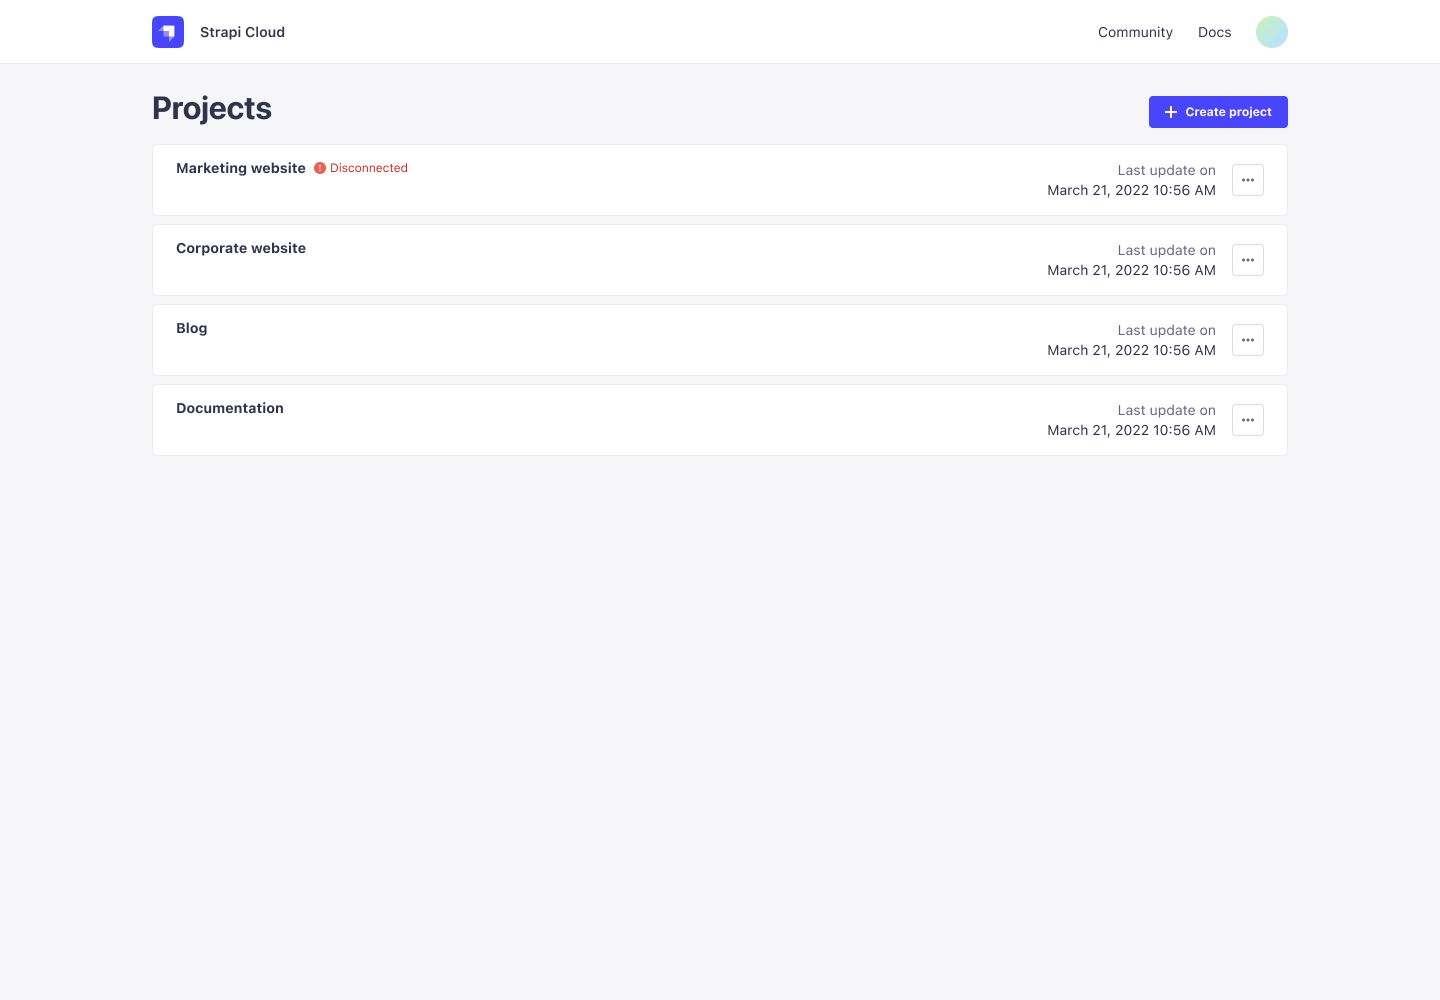
Each project card displays the following information:
- Project name
- Status: Displays a Disconnected warning if the project repository is not connected to Strapi Cloud.
- Last deployment date: Timestamp of the last deployment.
# Project details
From the Projects page, click on any project card to access that project's details page.
The project details page displays the following tabs: Deploys and Settings.
# Deploys
The Deploys tab displays a chronological list of cards with the details of all historical deployments for the project.
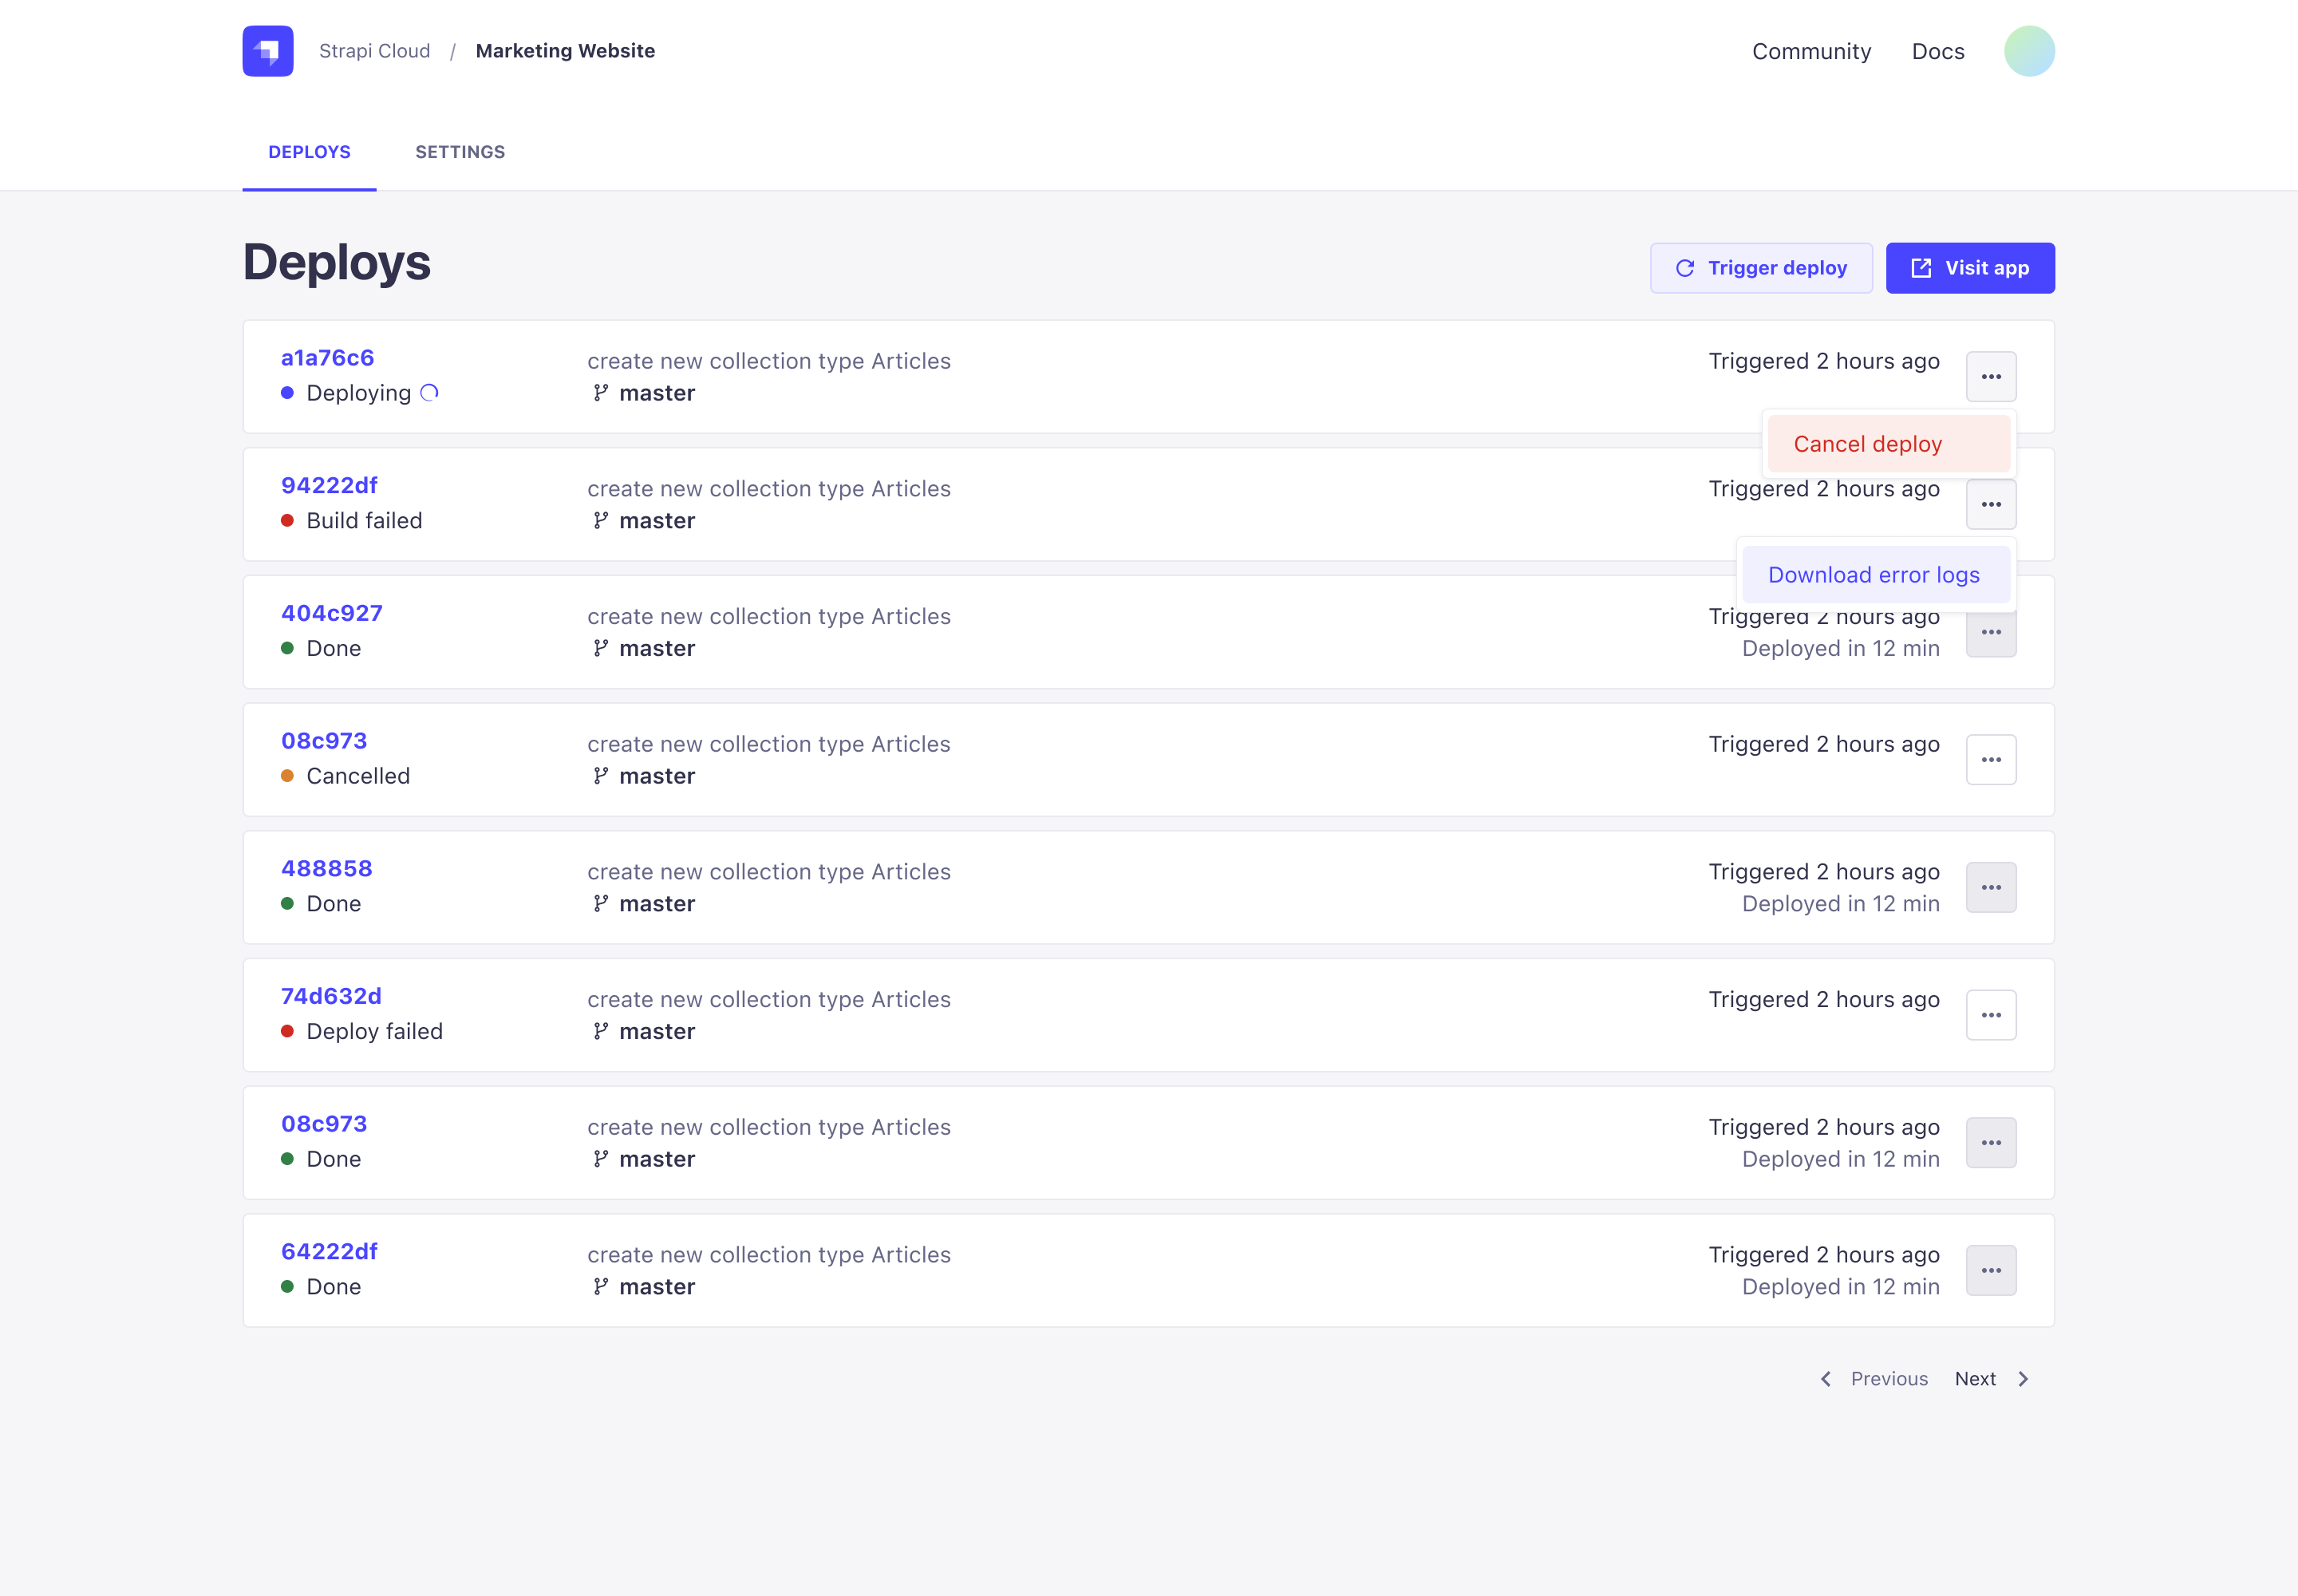
Each card displays the following information:
- Commit SHA
- Commit message
- Deployment status: Whether the project is
- Deploying
- Done
- Cancelled
- Build failed
- Deploy failed
- Last deployment time: When the deployment was triggered and the duration.
- Production branch
- Options menu (
...): The available options vary depending on the deployment status.- For Done status: No further options.
- For Deploying status, you can:
- Cancel deploy
- For Build failed status, you can:
- Download error logs
- For Deploy failed status, you can:
- Download error logs
From this page you can also trigger a new deployment and access the application using the corresponding buttons.
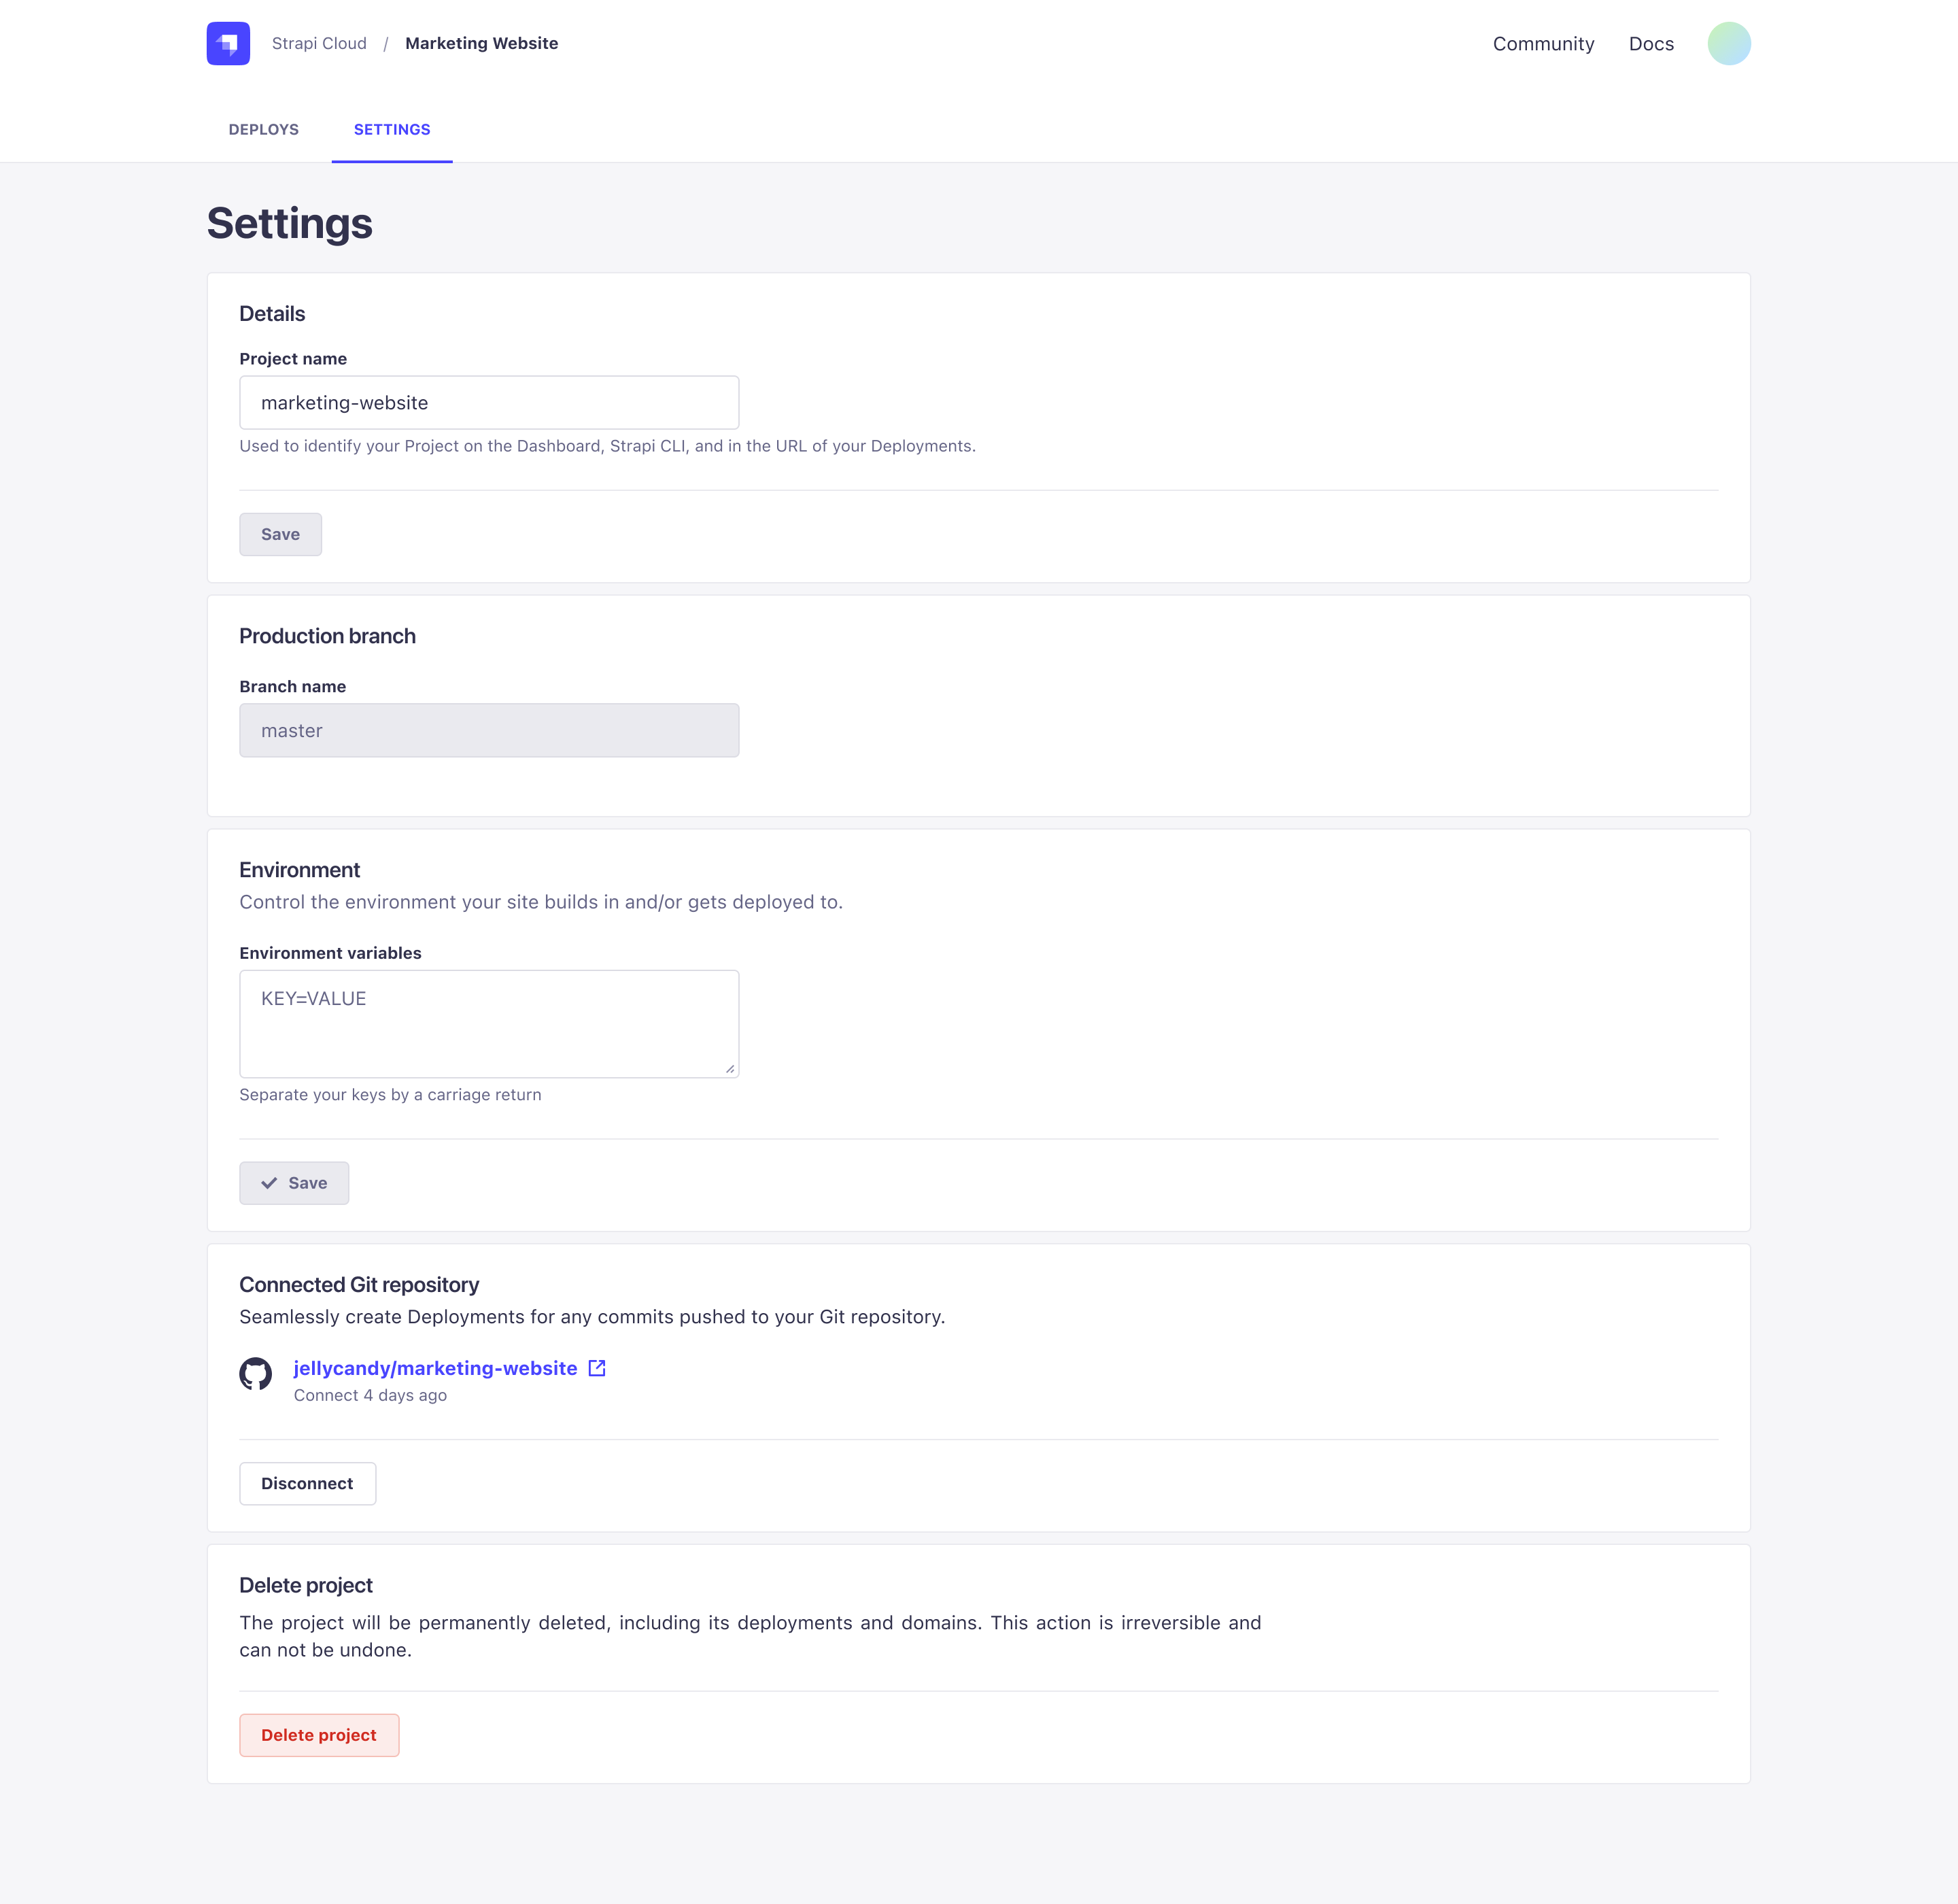
# Settings
The Settings tab enables you to edit the following details for the project:
- Project name: The name of your Strapi app, used to identify the project on the Cloud Dashboard, Strapi CLI, and deployment URLs.
- Production branch: The branch of the linked repository to use for production deployments.
- Environment variables: Environment variables are used to configure the environment of your Strapi app.
- Connected GitHub repository: The Git repository linked to the project.
- Delete project: This will permanently and irreversibly delete the project and all its associated data.
← TypeScript Amazon AWS →