# Managing global settings
Global settings for plugins and features are managed from  Settings in the main navigation of the admin panel.
# Customizing the admin panel
The default Strapi logo, displayed in the main navigation of a Strapi application, can be modified through the Settings > Overview sub-section of the admin panel.
✏️ NOTE
The logo displayed in the admin panel can also be customized programmatically via the Strapi application's configuration files (see Developer Documentation). However, the logo uploaded via the admin panel supersedes any logo set through the configuration files.
Note also that modifying the configuration files (see Developer Documentation) also allows changing the logo displayed in the login page of the application, which is not yet possible via the Settings section of the admin panel.
![]()
To customize the logo of the admin panel:
- Go to the Global settings > Overview sub-section of the settings interface.
- Click on the upload area.
- Upload your chosen logo, either by browsing files, drag & dropping the file in the right area, or by using a URL. The logo shouldn't be more than 750x750px.
- Click on the Upload logo button in the upload window.
- Click on the Save button in the top right corner.
💡 TIP
Once uploaded, the new logo can be replaced with another one  , or reset
 ![]() with the default Strapi logo or the logo set in the configuration files.
with the default Strapi logo or the logo set in the configuration files.
# Configuring Single Sign-On Gold (opens new window)
Single Sign-On (SSO) can be made available on a Strapi application to allow administrators to authenticate through an identity provider (e.g. Microsoft Azure Active Directory).
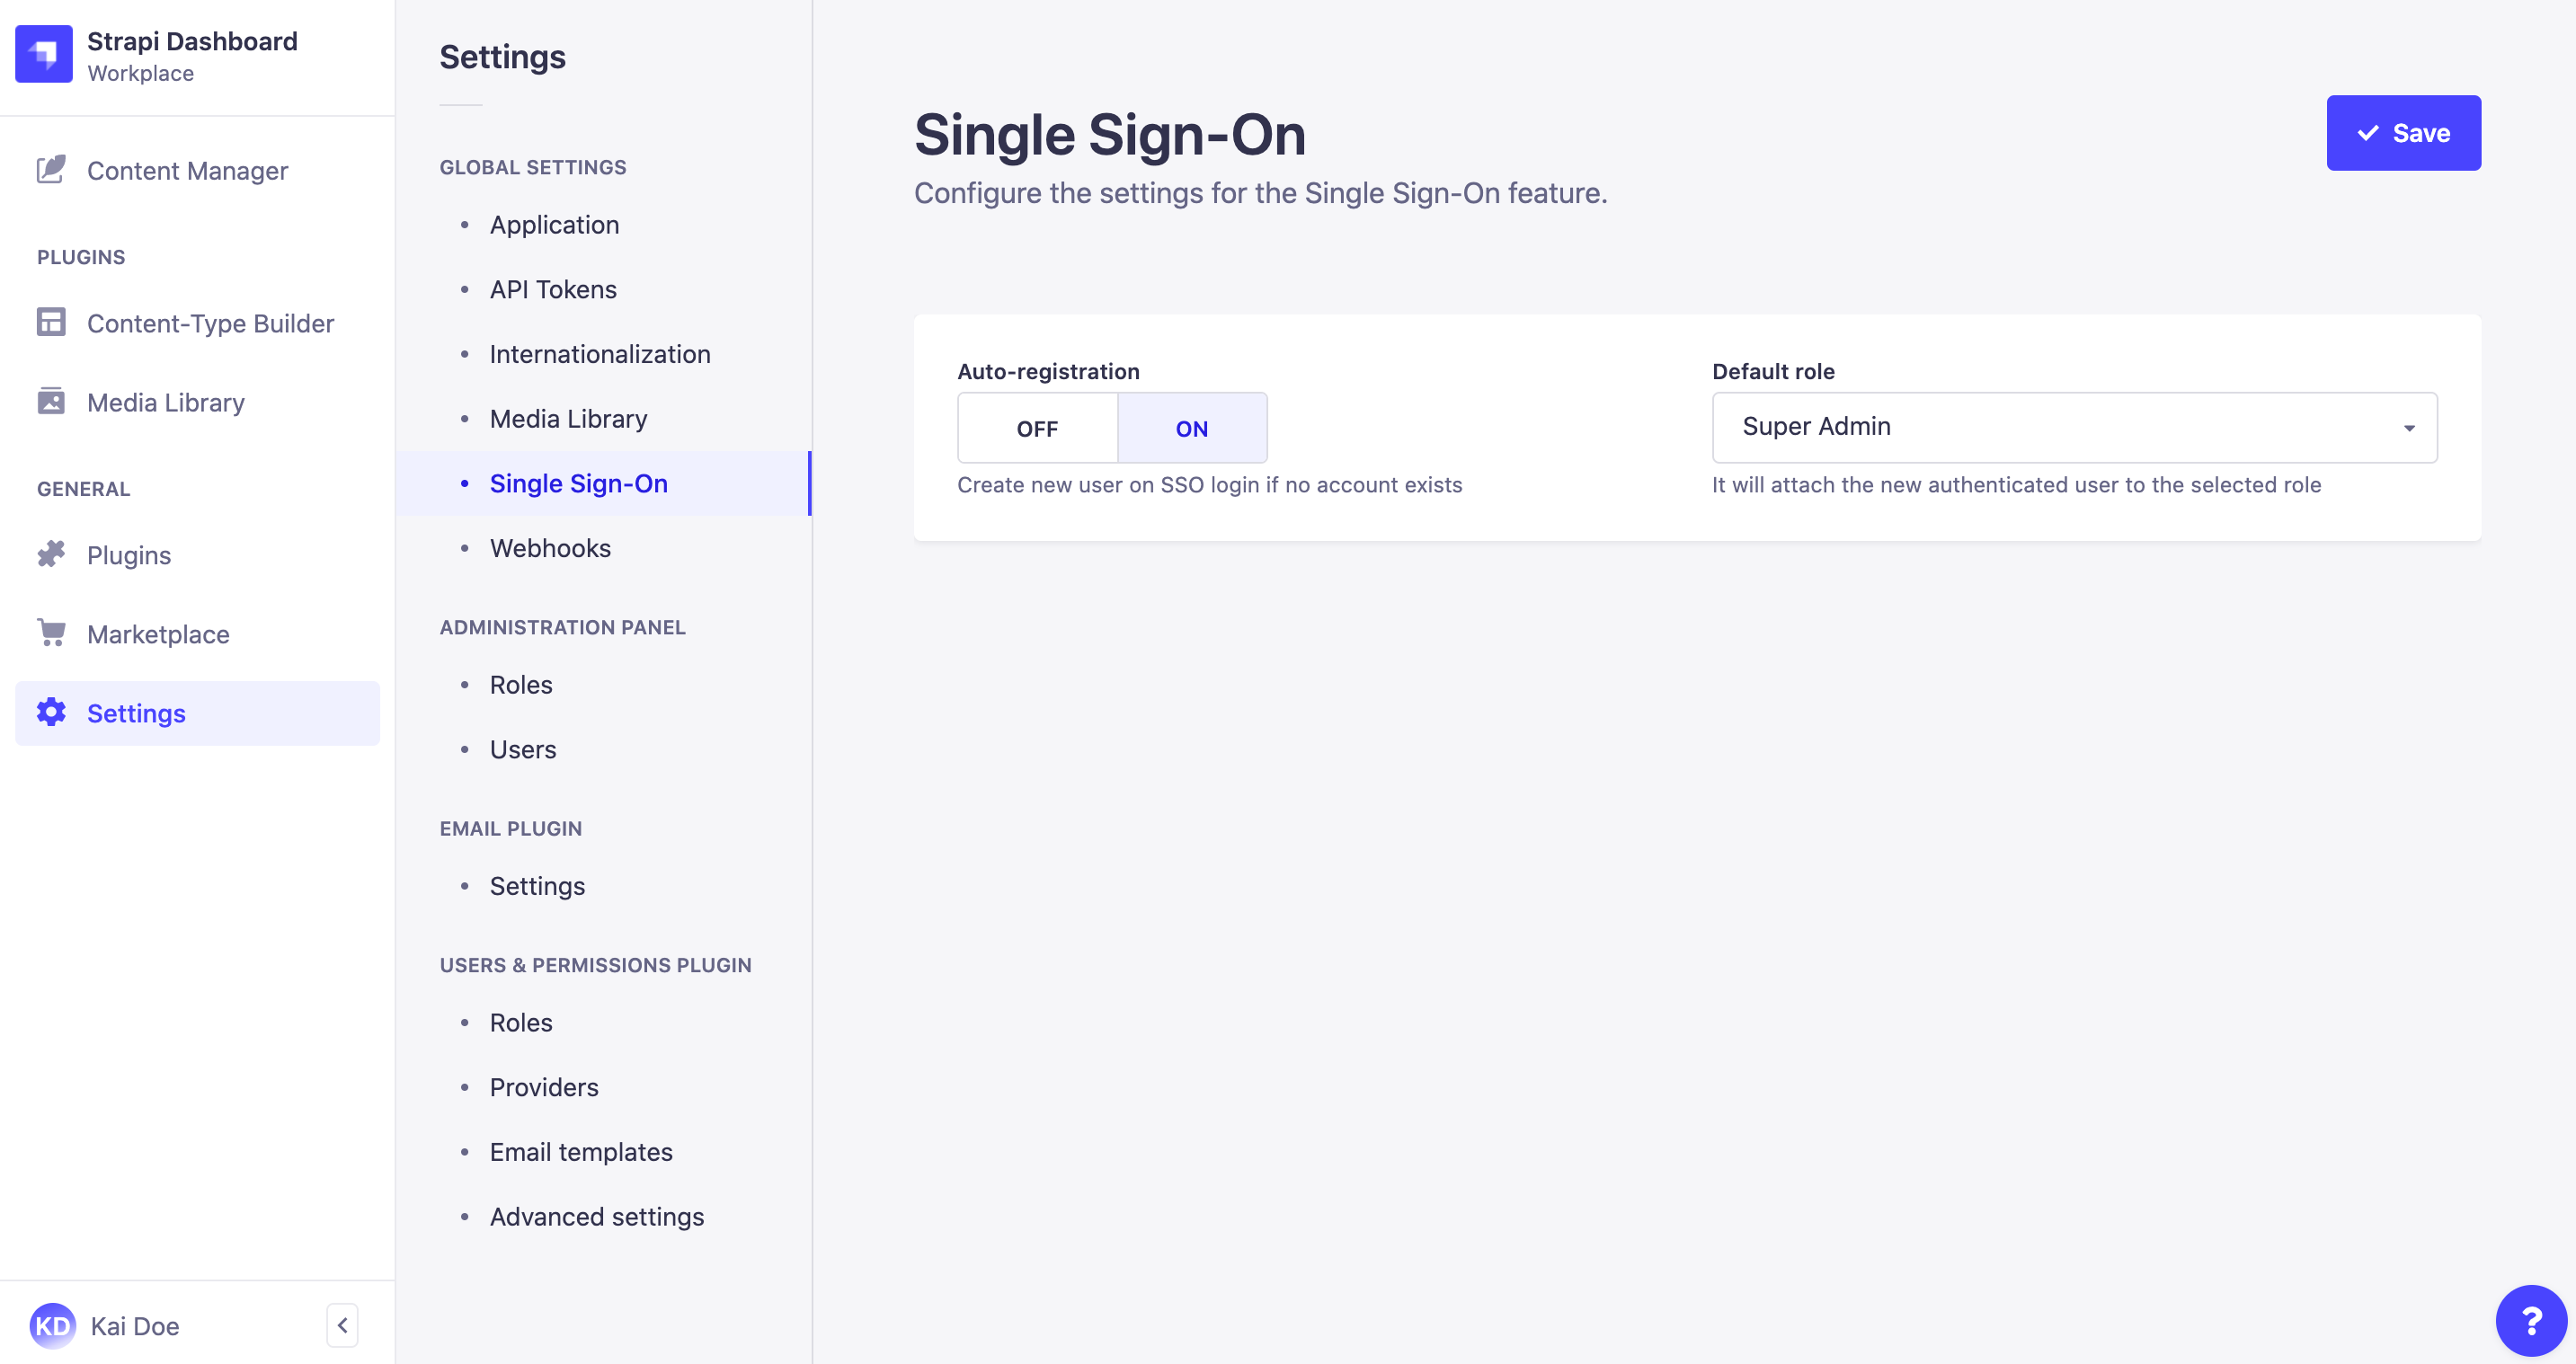
To configure the SSO feature settings:
- Go to the Global settings > Single Sign-On sub-section of the settings interface.
- Define your chosen new settings:
| Setting name | Instructions |
|---|---|
| Auto-registration | Click on ON to allow the automatic creation of a new Strapi administrator when an SSO login does not match an existing Strapi administrator account. If this setting is set on OFF, new Strapi administrators accounts must be created manually beforehand. |
| Default role | Choose among the drop-down list the role to attribute by default to auto-registered Strapi administrators through SSO login. |
- Click the Save button.
# Configuring Internationalization locales
The Internationalization plugin allows to manage content in different languages, called "locales". Once the Internationalization plugin is installed in a Strapi application (see Installing plugins via the Marketplace), administrators can manage locales from the Global settings > Internationalization sub-section of the settings interface.
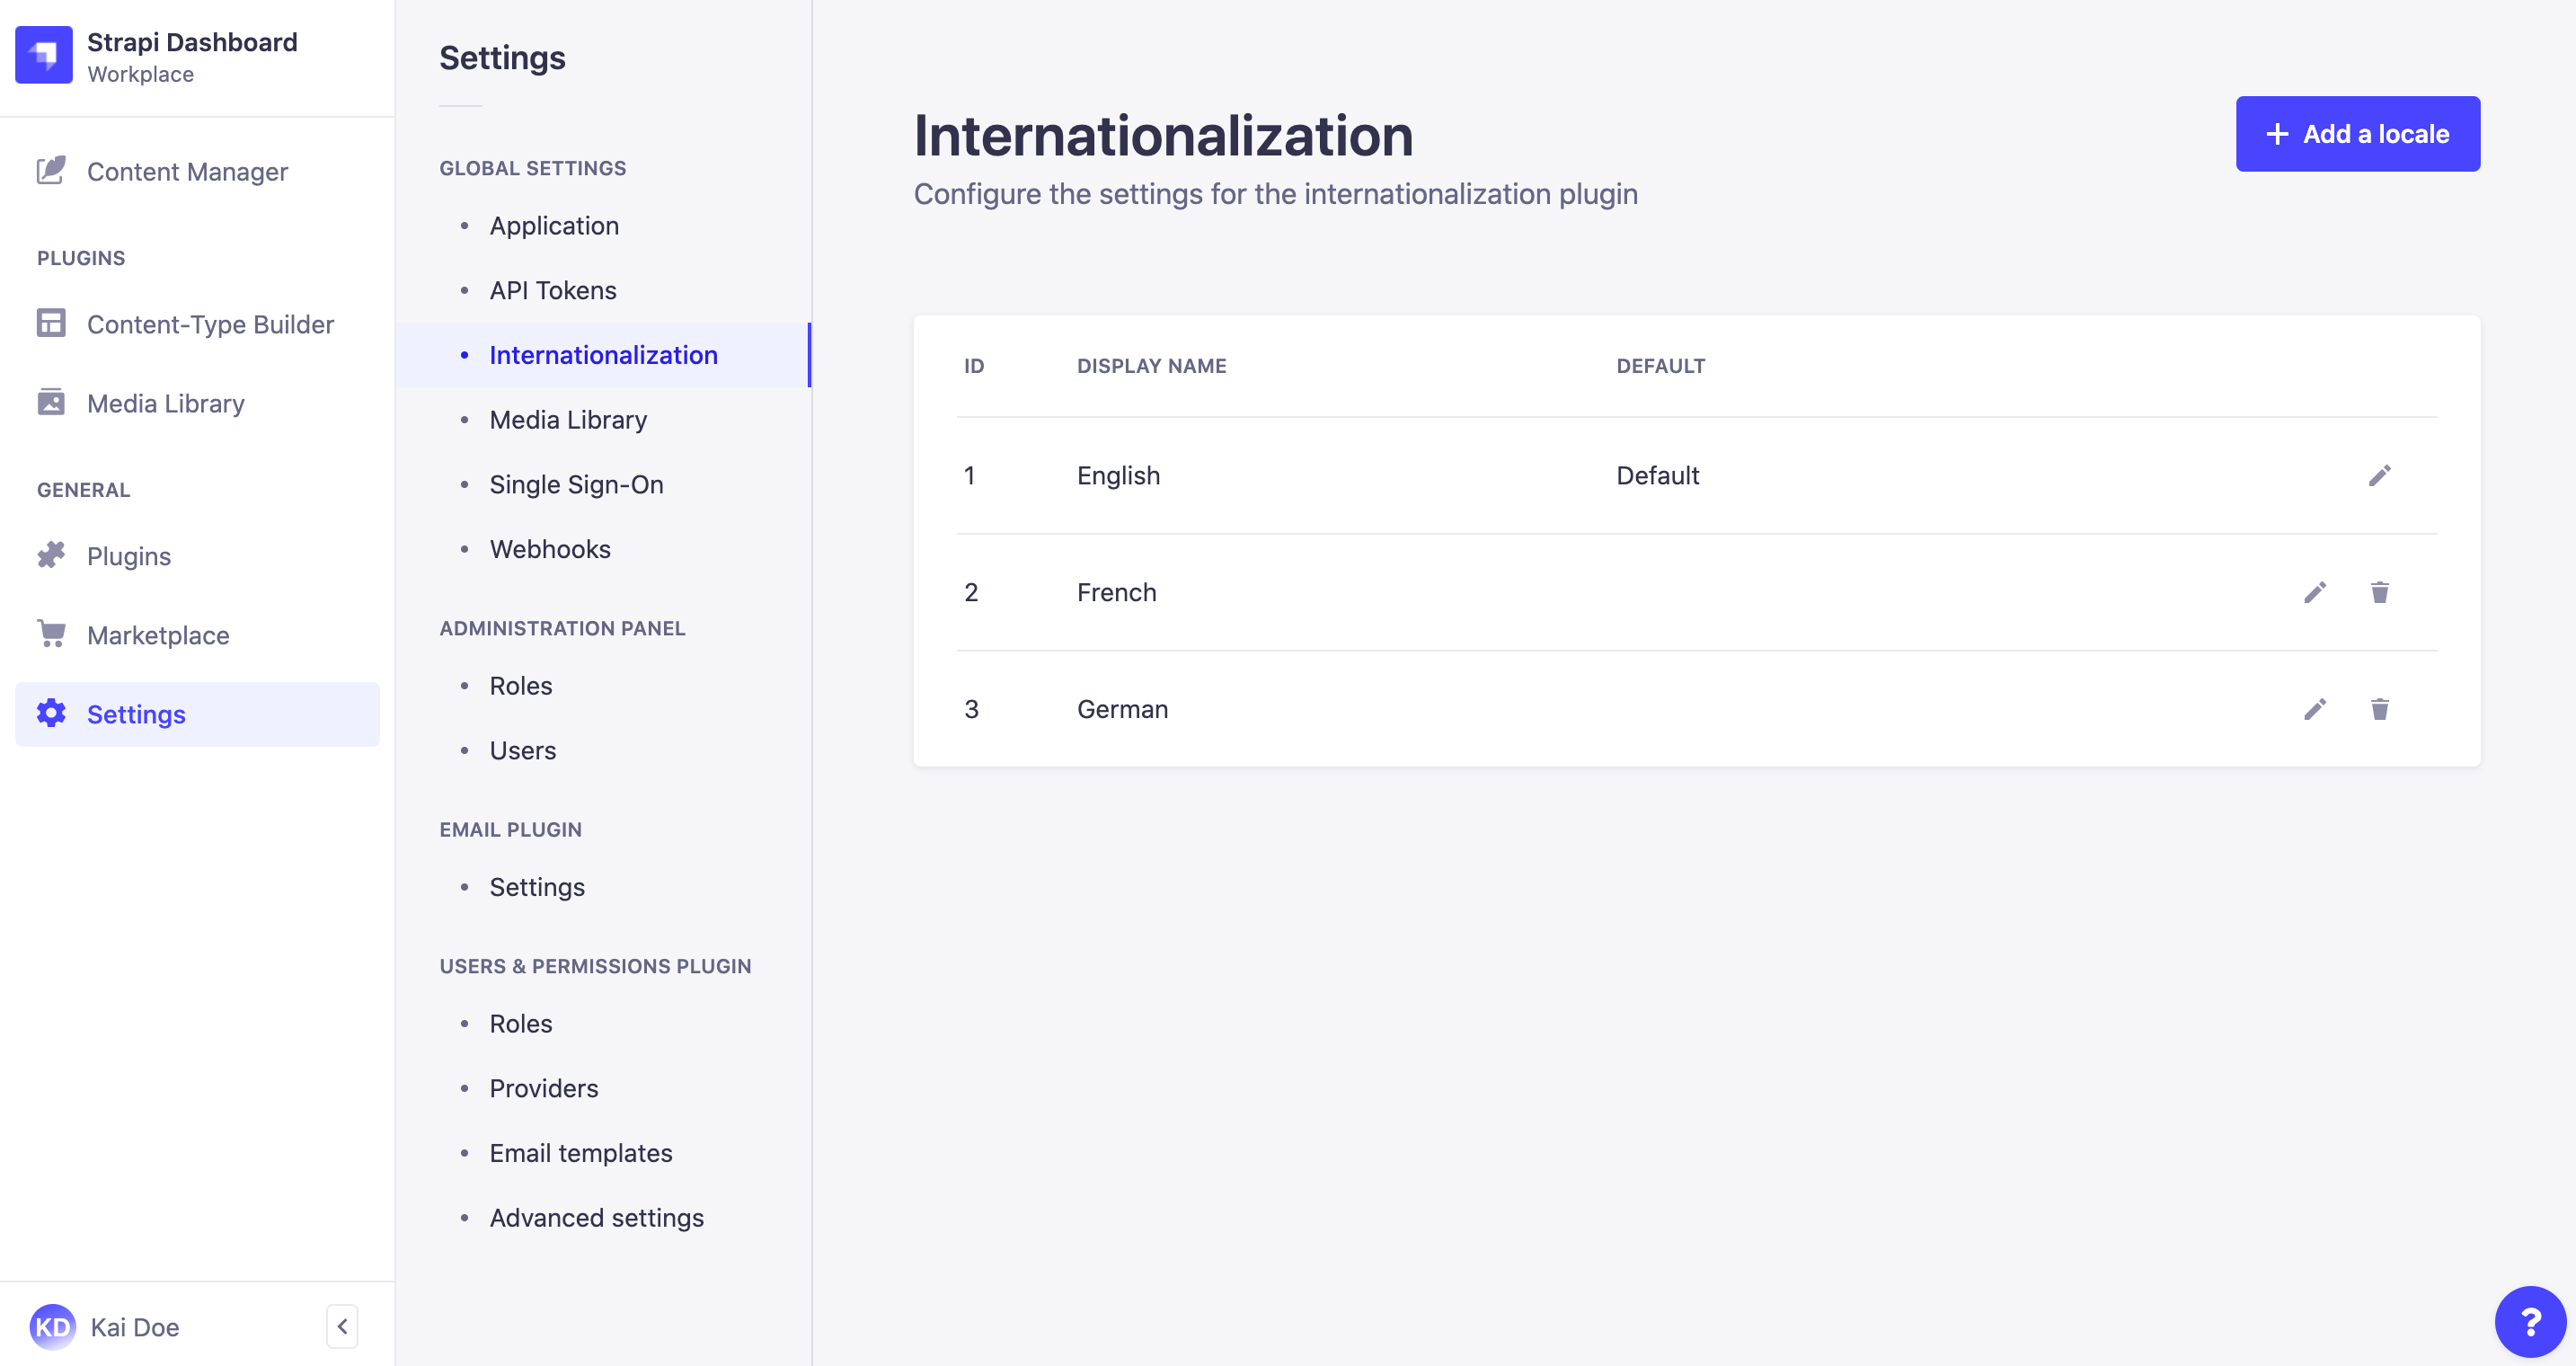
The Internationalization settings sub-section displays a table listing all locales available for the Strapi application. By default, only the English locale is configured and set as the default locale.
For each locale, the table displays the default ISO code of the locale, its optional display name and indicates if the locale is set as the default one. From the table, administrators can also:
- Click on the edit button
 to edit a locale
 - Click on the delete button
 to delete a locale
# Adding a new locale
Administrators can add and manage as many locales as they want. There can however only be one locale set as the default one for the whole Strapi application.
✏️ NOTE
It is not possible to create custom locales. Locales can only be created based on the 500+ pre-created list of locales (opens new window) set by Strapi.
To add a new locale:
- Click on the Add new locale button.
- In the locale addition window, choose your new locale among the Locales drop-down list. The latter lists alphabetically all locales, displayed as their ISO code, that can be added to your Strapi application.
- (optional) In the Locale display name textbox, write a new display name for your new locale.
- (optional) In the Advanced settings tab, tick the Set as default locale setting to make your new locale the default one for your Strapi application.
- Click on the Save button to confirm the addition of your new locale.
# Configuring the Media Library
The Media Library displays all assets uploaded in the Strapi application. The Media Library settings allow controlling the format, file size, and orientation of uploaded assets.
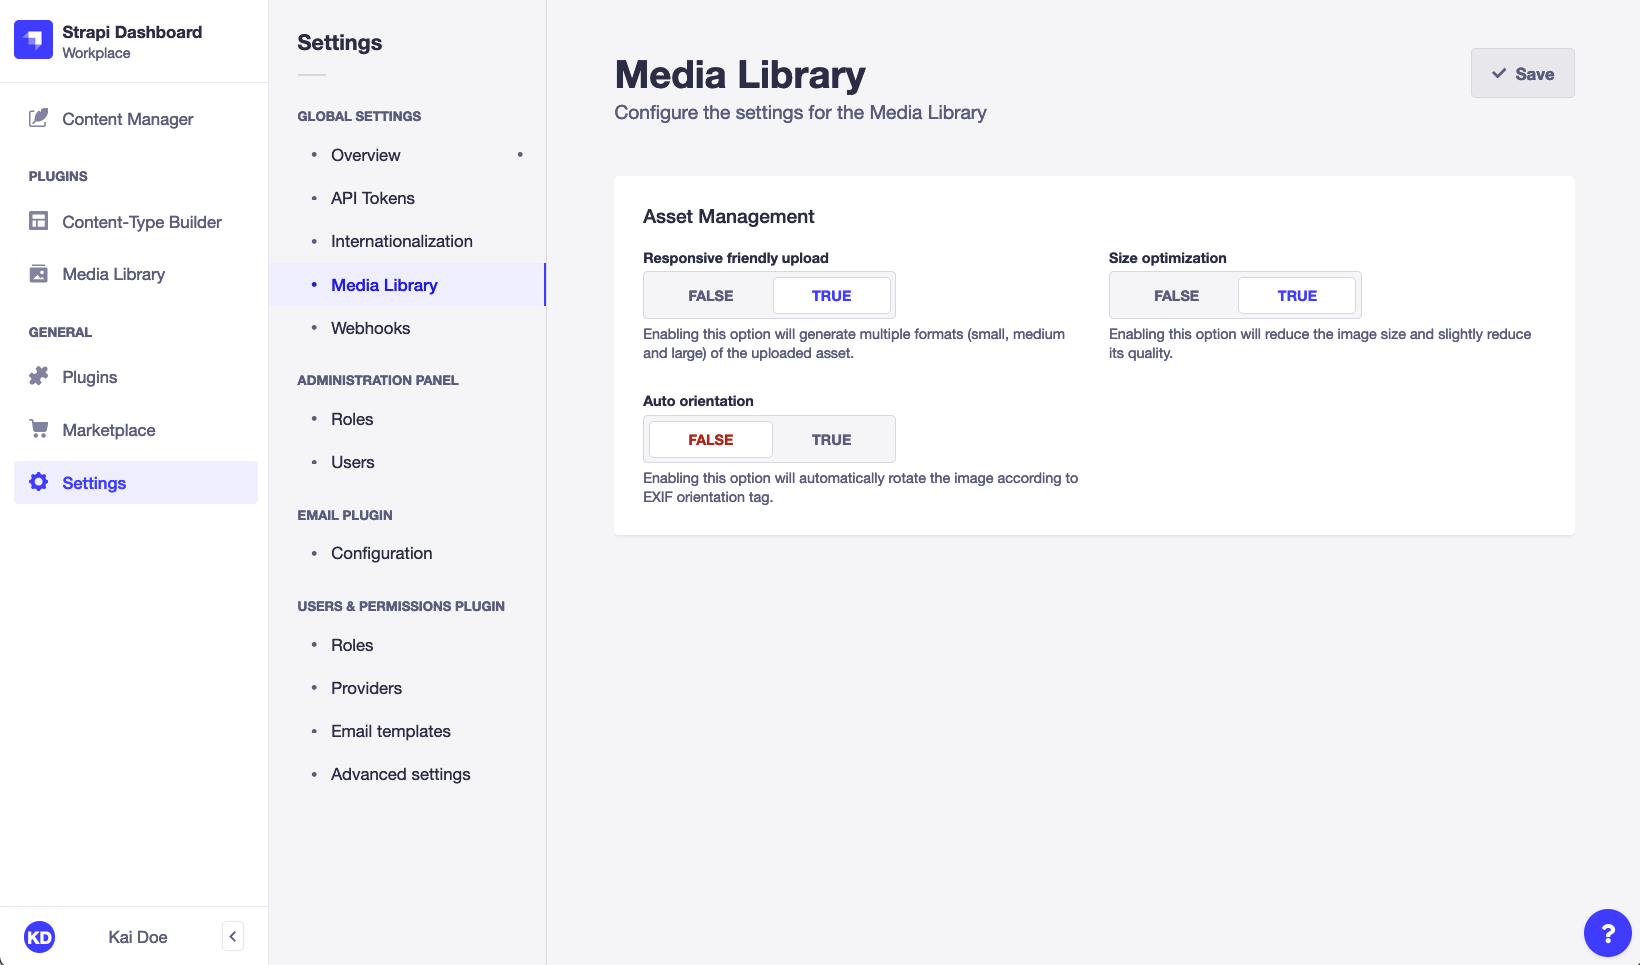
To configure the Media Library settings:
Go to the Global settings > Media Library sub-section of the settings interface.
Define your chosen new settings:
Setting name Instructions Default value Responsive friendly upload Enabling this option will generate multiple formats (small, medium and large) of the uploaded asset. True Size optimization Enabling this option will reduce the image size and slightly reduce its quality. True Auto orientation Enabling this option will automatically rotate the image according to EXIF orientation tag. False Click on the Save button.
# Managing API tokens
PREREQUISITES
- Administrators can create, read, update, or delete API tokens only if proper permissions are granted (see Configuring administrator roles).
- The Global settings > API Tokens sub-section of the settings interface is accessible in the admin panel only if the API tokens > Read permission is granted.
API tokens allow users to authenticate REST and GraphQL API queries (see Developer Documentation). Administrators can manage API tokens through the Global settings > API Tokens sub-section of the settings interface.
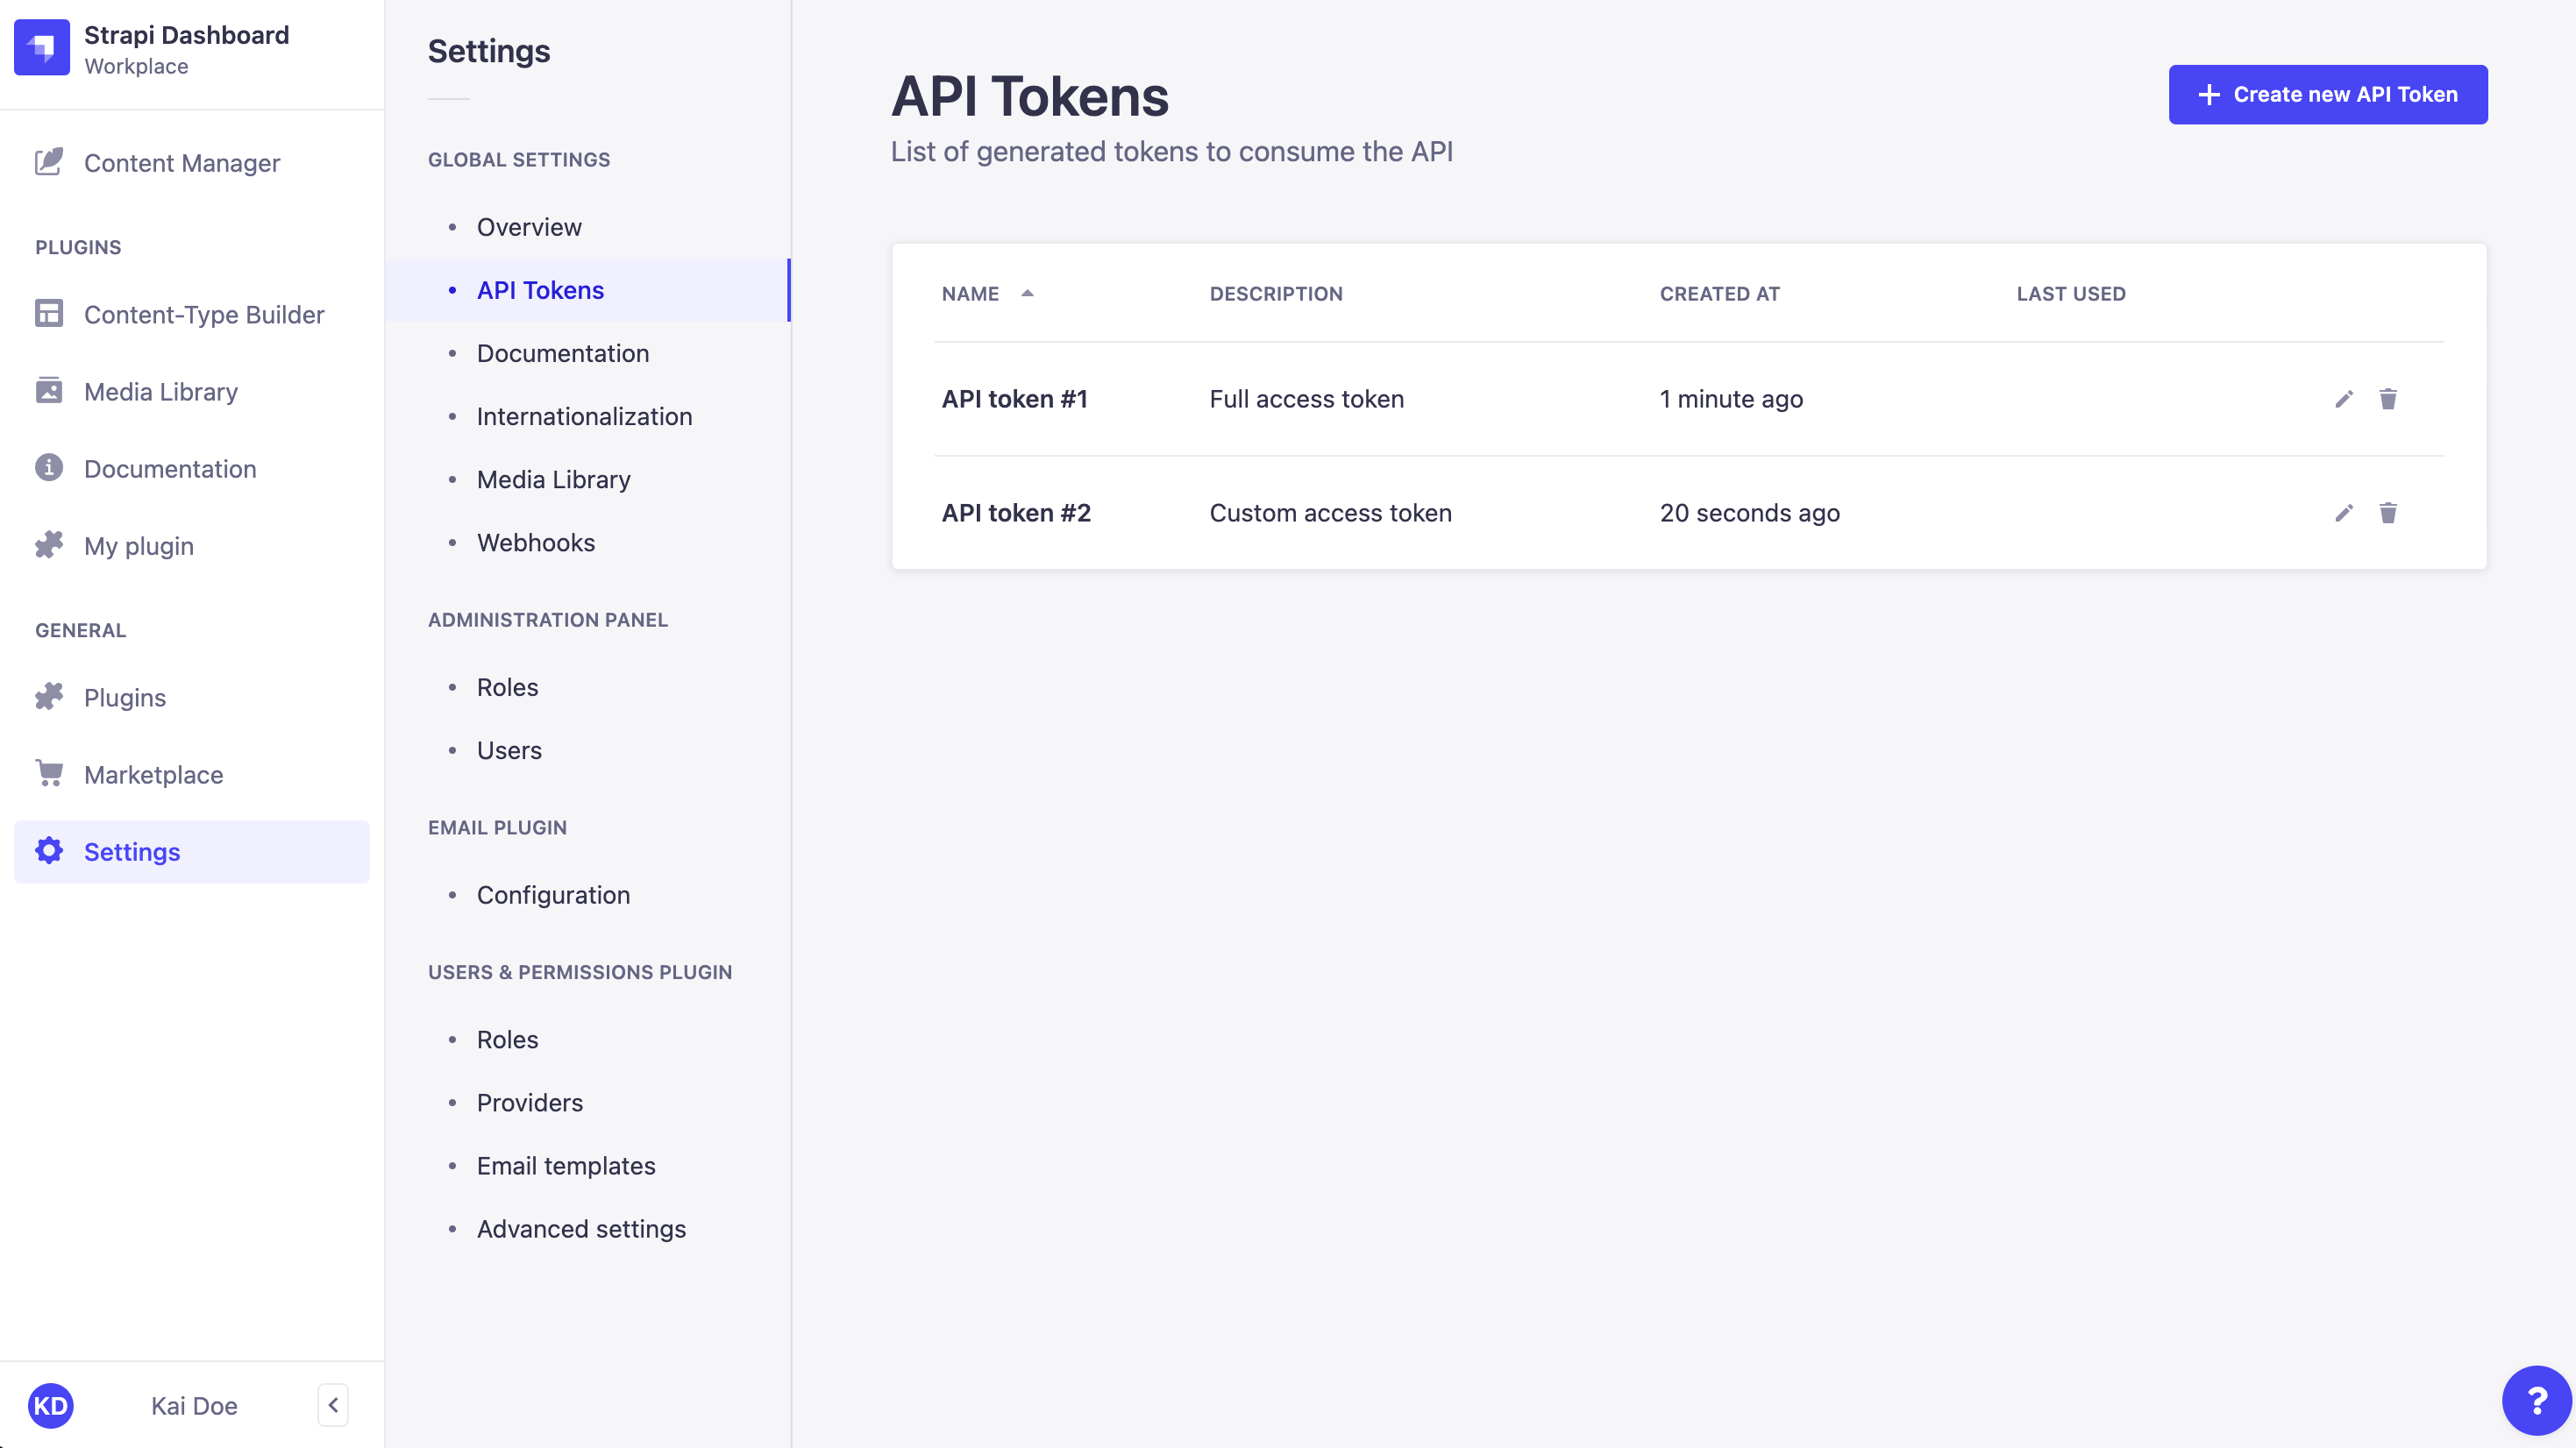
The API Tokens settings sub-section displays a table listing all of the created API tokens.
The table displays each API token's name, description, date of creation, and date of last use. From the table, administrators can also:
- Click on the edit button to edit an API token's name, description, type, duration or regenerate the token.
- Click on the delete button to delete an API token.
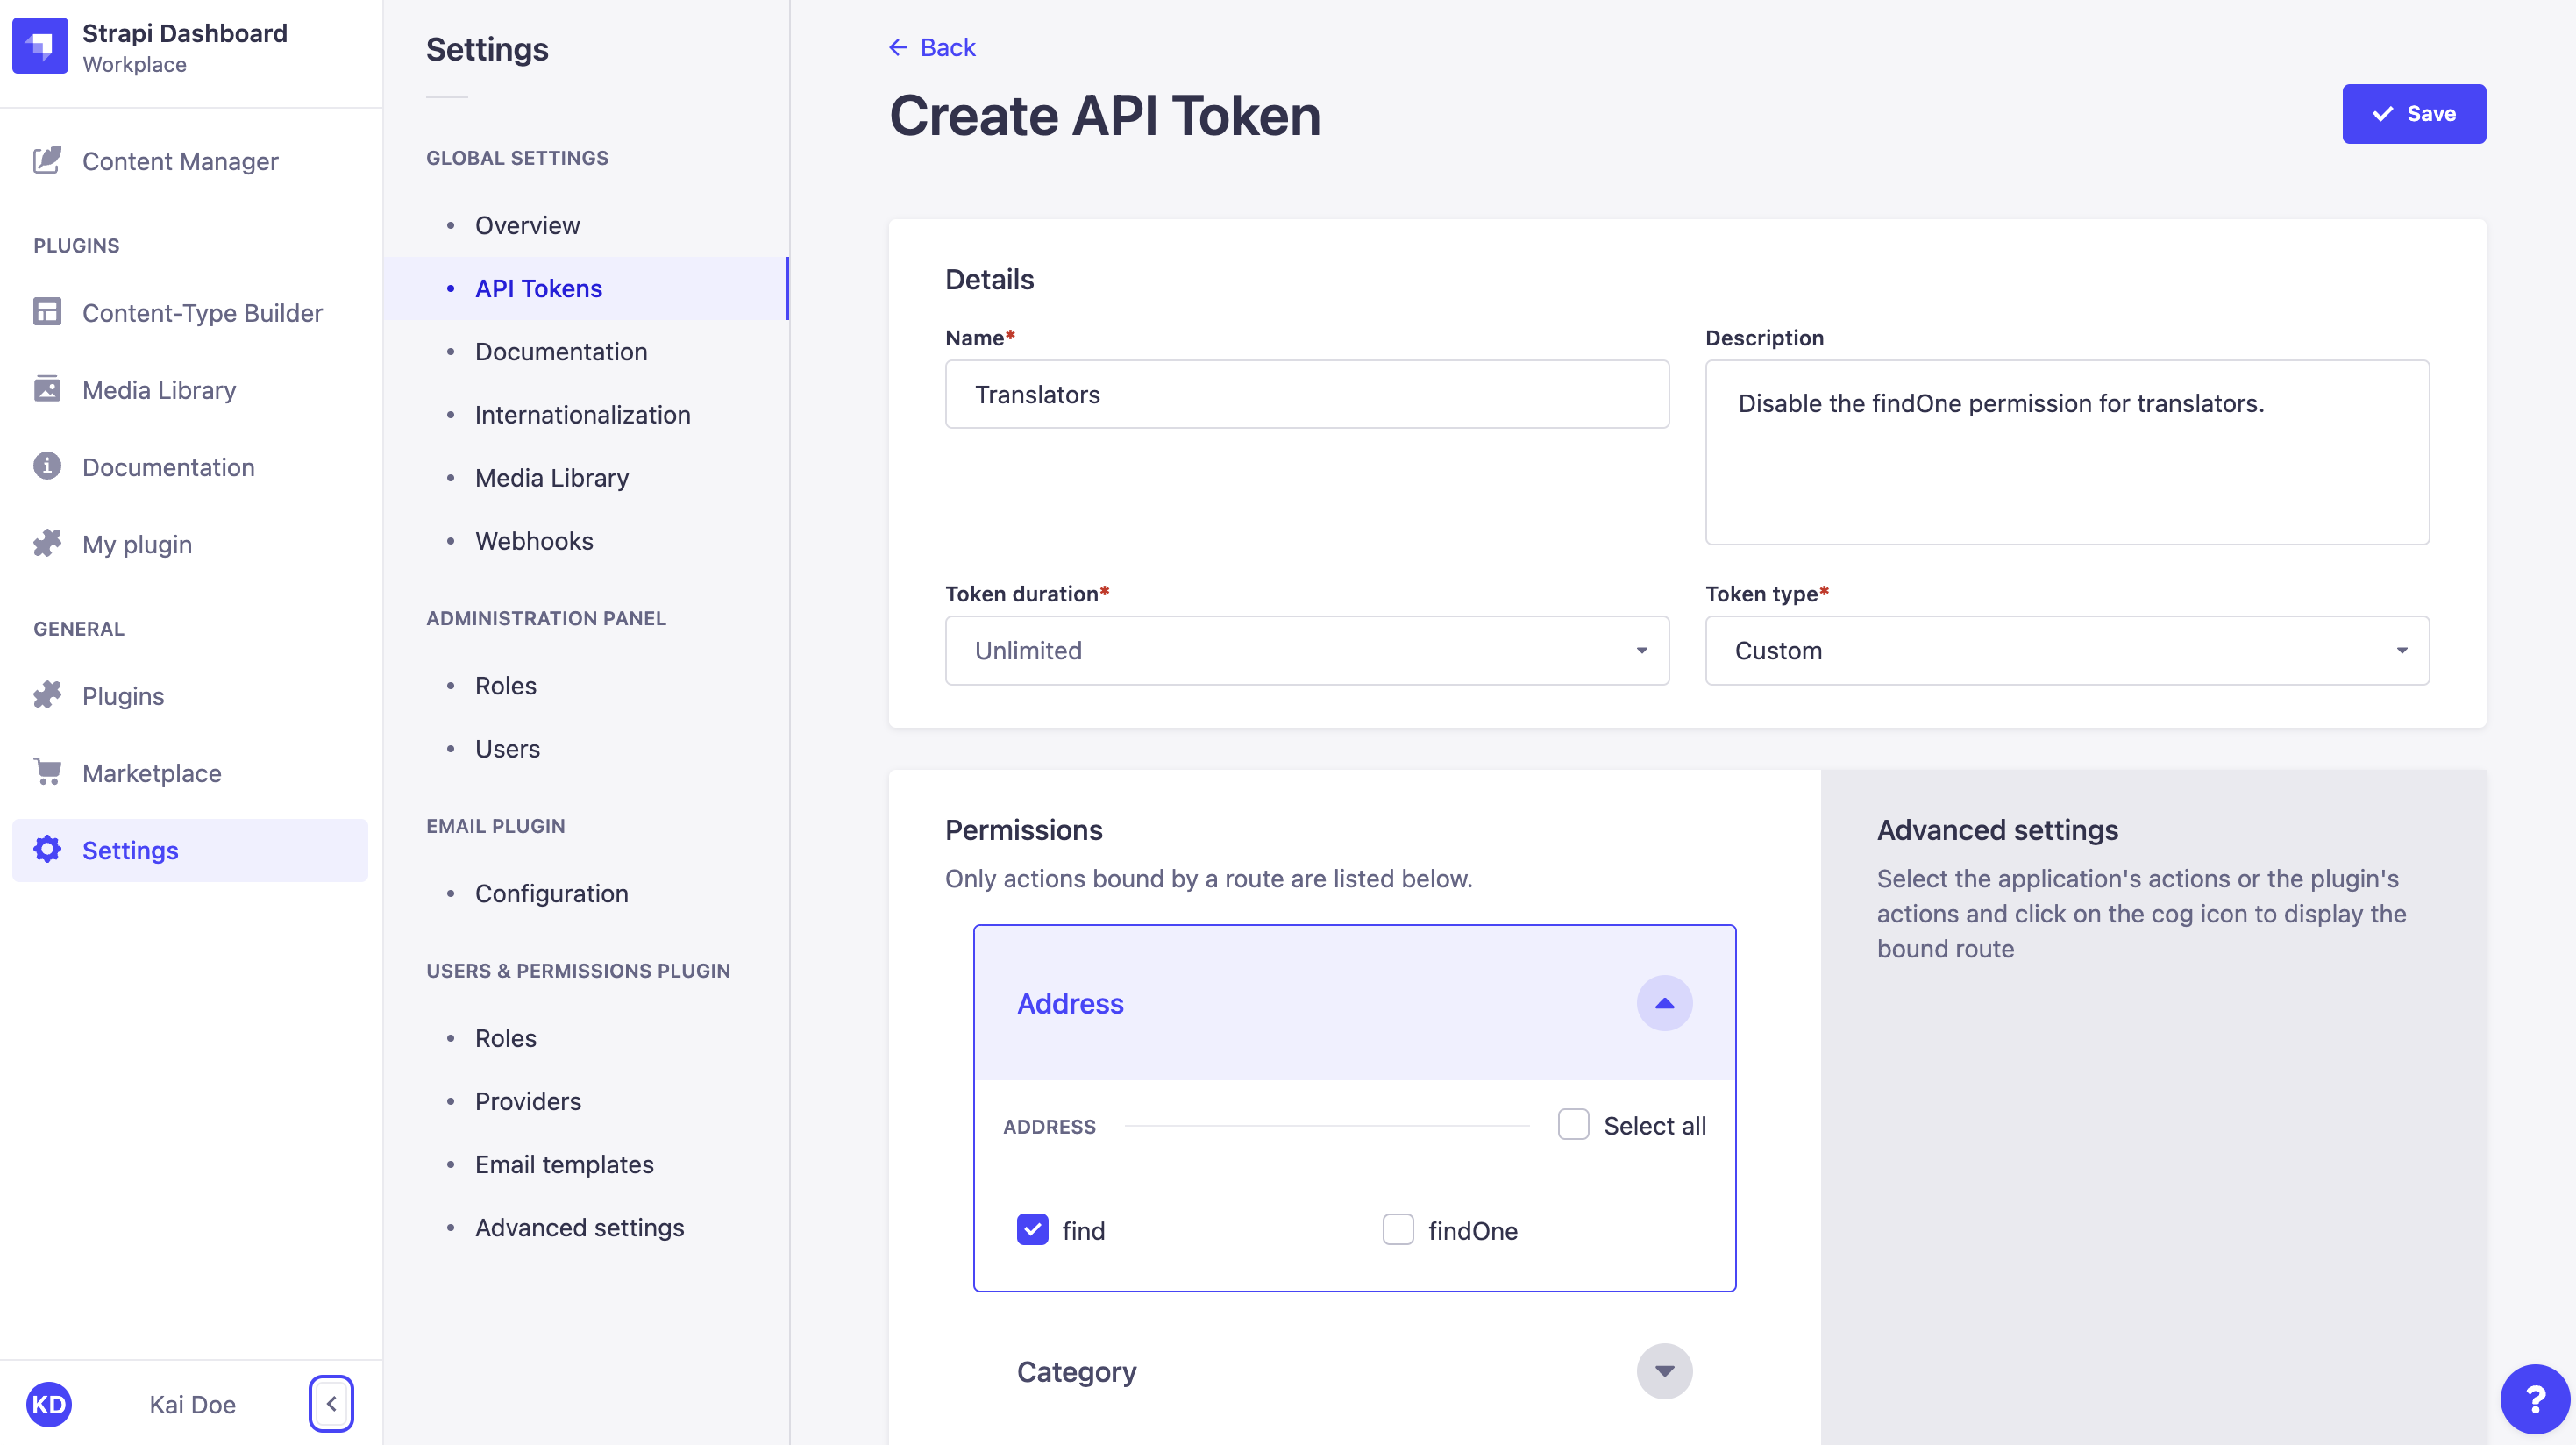
# Creating a new API token
To create a new API token:
Click on the Create new API Token button.
In the API token edition interface, configure the new API token:
Setting name Instructions Name Write the name of the API token. Description (optional) Write a description for the API token. Token duration Choose a token duration: 7 days, 30 days, 90 days, or Unlimited. Token type Choose a token type: Read-only, Full access, or Custom. (optional) For the Custom token type, define specific permissions for your API endpoints by clicking on the content-type name and using checkboxes to enable or disable permissions.
Click on the Save button. The new API token will be displayed at the top of the interface, along with a copy button .
✋ CAUTION
For security reasons, API tokens are only shown right after they have been created. When refreshing the page or navigating elsewhere in the admin panel, the newly created API token will be hidden and will not be displayed again.
# Regenerating an API token
To regenerate an API token:
- Click on the API token's edit button.
- Click on the Regenerate button.
- Click on the Regenerate button to confirm in the dialog.
- Copy the new API token displayed at the top of the interface.
# Configuring other plugins
Installed plugins can add their own settings sub-sections. These sections are found at the bottom of the list of sub-sections, below the settings for pre-installed Strapi plugins. Settings for 3rd party plugins are described in the plugin's documentation on the Marketplace (opens new window).